
An elegant artificial orchid is a statement piece, and an easy way to decorate with little maintenance. There is no denying that artificial orchids can easily be mistaken for the real thing. Our new collection of orchids are packaged with care to ensure they arrive at their new home safely, therefore sometimes you may need a little help to style the ‘out of the box’ look.
By following our easy six-step routine, you can make your artificial orchid look lifelike and real with ease.
Our six steps to styling artificial orchids
Step 1
To begin, get together everything that you will need to style your artificial orchid. You will only need three household items: a pair of scissors, a large spoon and fragrance.
Step 2
The exciting moment has come; the orchid has arrived to you safely in its Homescapes box. The first thing to do is carefully cut open the cardboard box along the seam of tape.
Gently reach into the box and pull the orchid up from the base. The orchid has travelled to you in a compact box, therefore the leaves and petals will be close to the stem and will need some rearranging to create a lifelike plant.

Step 3
Always start styling your artificial orchid from the base and leaves upwards. Begin with the leaf closest to the base, so not to cause a tangle. Place the spoon in your hand with the back of the spoon facing upwards.
Guide this side of the spoon along the back of the orchid leaves, to create a natural rounded shape.
Completing one set of leaves and then moving onto another, before you know it, your orchid will start to take shape!

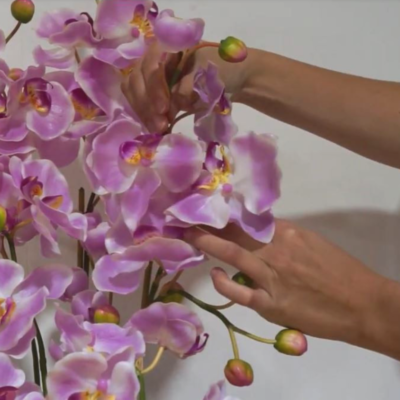
Step 4
Once the orchid leaves are complete, it is time to move on to the petals and stems. Here at Homescapes we pride ourselves in how many beautiful and realistic petals our new range of orchids have.
This can be overwhelming at first; you need to make yourself familiar with how many stems and manipulate these into the style and form you desire.
Top Tip – It is important to remember the space in which you are placing your orchid. If it is against a wall, then remember to bring each petal and bud forward facing. If the orchid is placed on a coffee table, then make sure the whole plant is arranged and looks great from every viewpoint.
Step 5
Each Orchid stem is made from wire, therefore extremely versatile and easy to form into your own design.
A key design tip to remember is to make the Orchid as symmetrical as possible. Try to balance the the stems out on either side, this creates a realistic and elegant look.

Step 6
Now your orchid is looking lifelike the only thing missing is the scent. Although there are many advantages to having faux flowers – such as easy to clean, lasts forever and you never, have to water it. There is unfortunately one downside, as the Orchid will not have a natural flower scent. This is an easy fix! We suggest using Orchid scent spray onto the petals, or even a room spray.

The orchid we have used in this example is our gorgeous large, pink orchid with natural green buds inside a decorative black pot. Find more stunning artificial orchids over on our website!
Be sure to check out our top 10 artificial orchids that look 100% real.


